

There’s something truly enchanting about the scent of roasted garlic wafting through the kitchen. It not only warms the spirit but also beckons everyone to gather around the table in eager anticipation. I discovered this delightful Roasted Garlic and Herb No-Knead Bread recipe during one of my weekend baking adventures, where I sought to create something comforting yet impressively simple. With a few pantry staples and minimal effort, this loaf transforms into a golden-crusted masterpiece that elevates any meal.
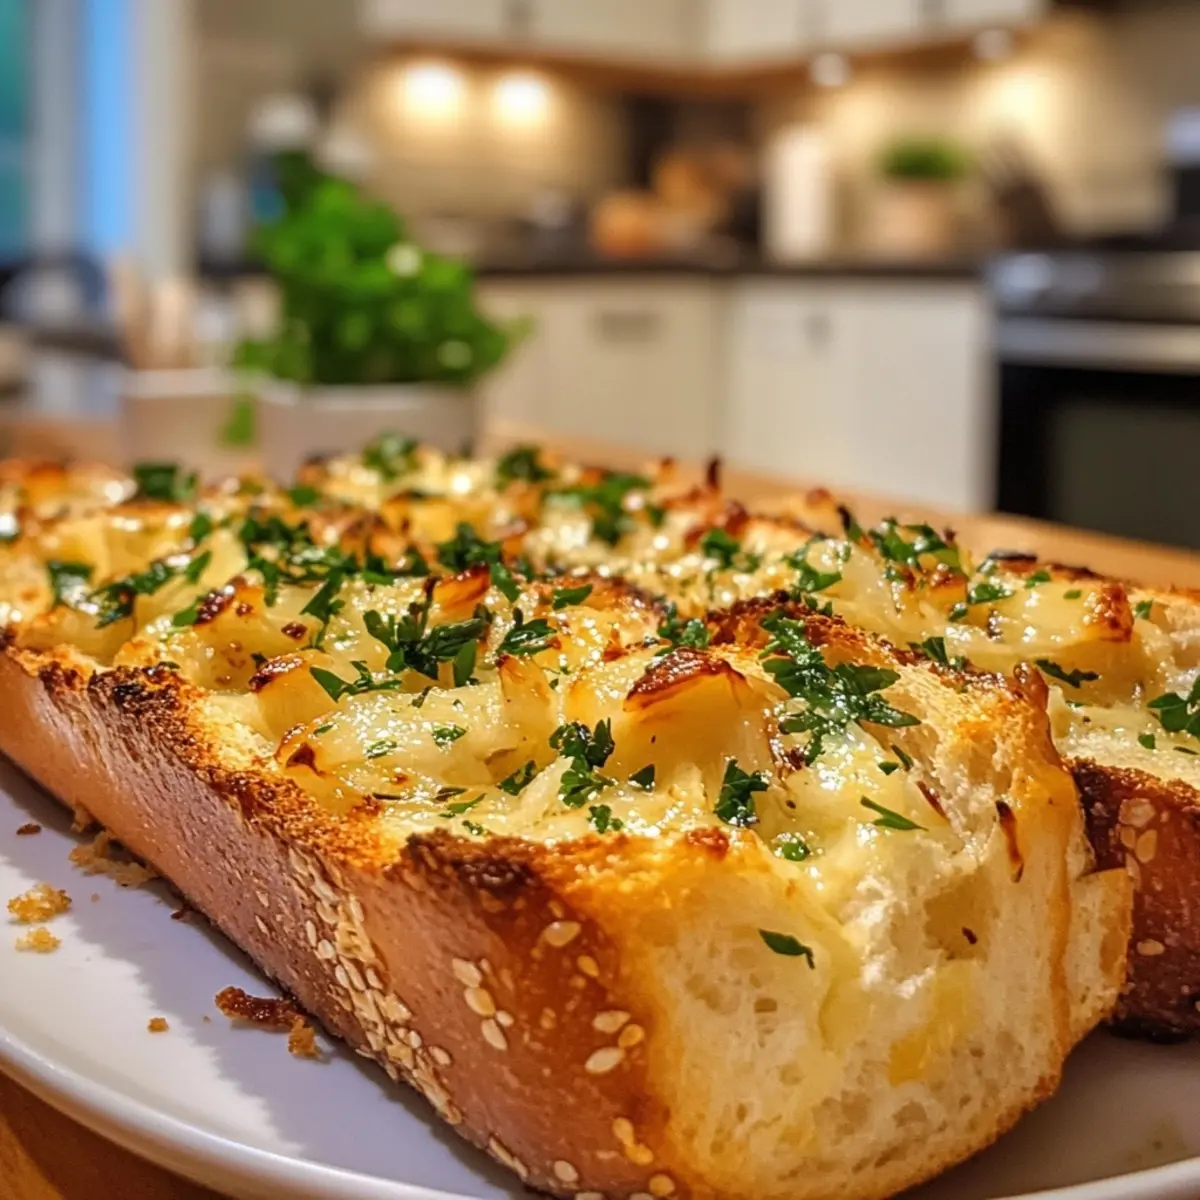
Imagine pulling apart a warm loaf, its soft and airy interior bursting with the rich flavors of roasted garlic and fresh herbs. Whether you slather it with butter, serve it with your favorite soup, or craft a gourmet sandwich, this no-knead wonder is undeniably versatile. Plus, with the magic of allowing the dough to rest, you can achieve artisan quality without all the fuss. Join me in creating this easy, flavorful bread that will surely become a staple in your home!

Why is Roasted Garlic Bread a Must-Try?
Irresistible aroma: The moment the bread begins to bake, your kitchen will fill with a heavenly scent that’ll draw everyone in.
Minimal effort: This no-knead method allows you to enjoy homemade goodness without the need for a lot of hands-on work.
Versatile pairing: Perfectly accompany soups, stews, or enjoy it solo with butter—its adaptability makes it the star of any meal.
Golden crust & airy interior: Achieve bakery-quality bread with a delightful texture that’s soft inside yet crusty outside.
Family favorite: This recipe is sure to impress, making it a go-to choice for gatherings or cozy family dinners.
Once you master this easy baking technique, you might find yourself craving this warm bread daily—just like my favorite Shortbread Cookies Melt recipe!
Roasted Garlic Bread Ingredients
• For the Dough
- All-Purpose Flour – Provides structure; substitute with a gluten-free flour blend, adjusting the liquid as necessary.
- Roasted Garlic – Infuses the bread with rich flavor; using fresh or store-bought makes it easy.
- Fresh Herbs (e.g., parsley, basil, oregano) – Adds flavor depth; feel free to customize according to your taste.
- Salt – Essential for enhancing flavor and ensuring a balanced taste.
- Yeast – Acts as a leavening agent for an airy texture; always use fresh yeast for the best results.
- Water – Hydrates the dough and activates yeast; warm water (around 110°F) is key for optimal activation.
- Olive Oil – Adds moisture and flavor; can be swapped with melted butter if you prefer.
• For the Baking
- Dutch Oven – Perfect for baking to create a crusty exterior and soft interior; helps achieve that artisan-style loaf.
With these simple ingredients, your Roasted Garlic Bread will not only satisfy cravings but also elevate your cooking game!
How to Make Roasted Garlic Bread
- Mix Dough: In a large bowl, whisk together all-purpose flour, salt, and yeast. Gently fold in the roasted garlic and minced fresh herbs, creating a fragrant mix that will be the base of your bread.
- Combine Wet Ingredients: Pour warm water and olive oil into the dry mixture, stirring gently until it all comes together. The dough should be a sticky, shaggy mass—don’t worry, that’s just what we want!
- Rest the Dough: Cover the bowl tightly with plastic wrap or a kitchen towel. Let it rest at room temperature for 12-18 hours, during which bubbles will form on the surface, showing it’s alive and ready!
- Preheat Oven: Place your Dutch oven (with the lid on) in the oven and preheat to 450°F (230°C). This is essential for creating that beautiful crust when baking.
- Shape the Loaf: Once rested, turn the dough out onto a floured surface. With gentle hands, shape it into a ball without deflating it too much; you want that airy texture to remain.
- Second Rise: Allow the shaped dough to rest for about 30 minutes while your oven finishes heating. This will help it puff up just a bit more for baking.
- Bake: Carefully transfer the dough into the hot Dutch oven. Cover and bake for 30 minutes. Then, remove the lid and bake for an additional 15-20 minutes, until the top is golden brown and delightful!
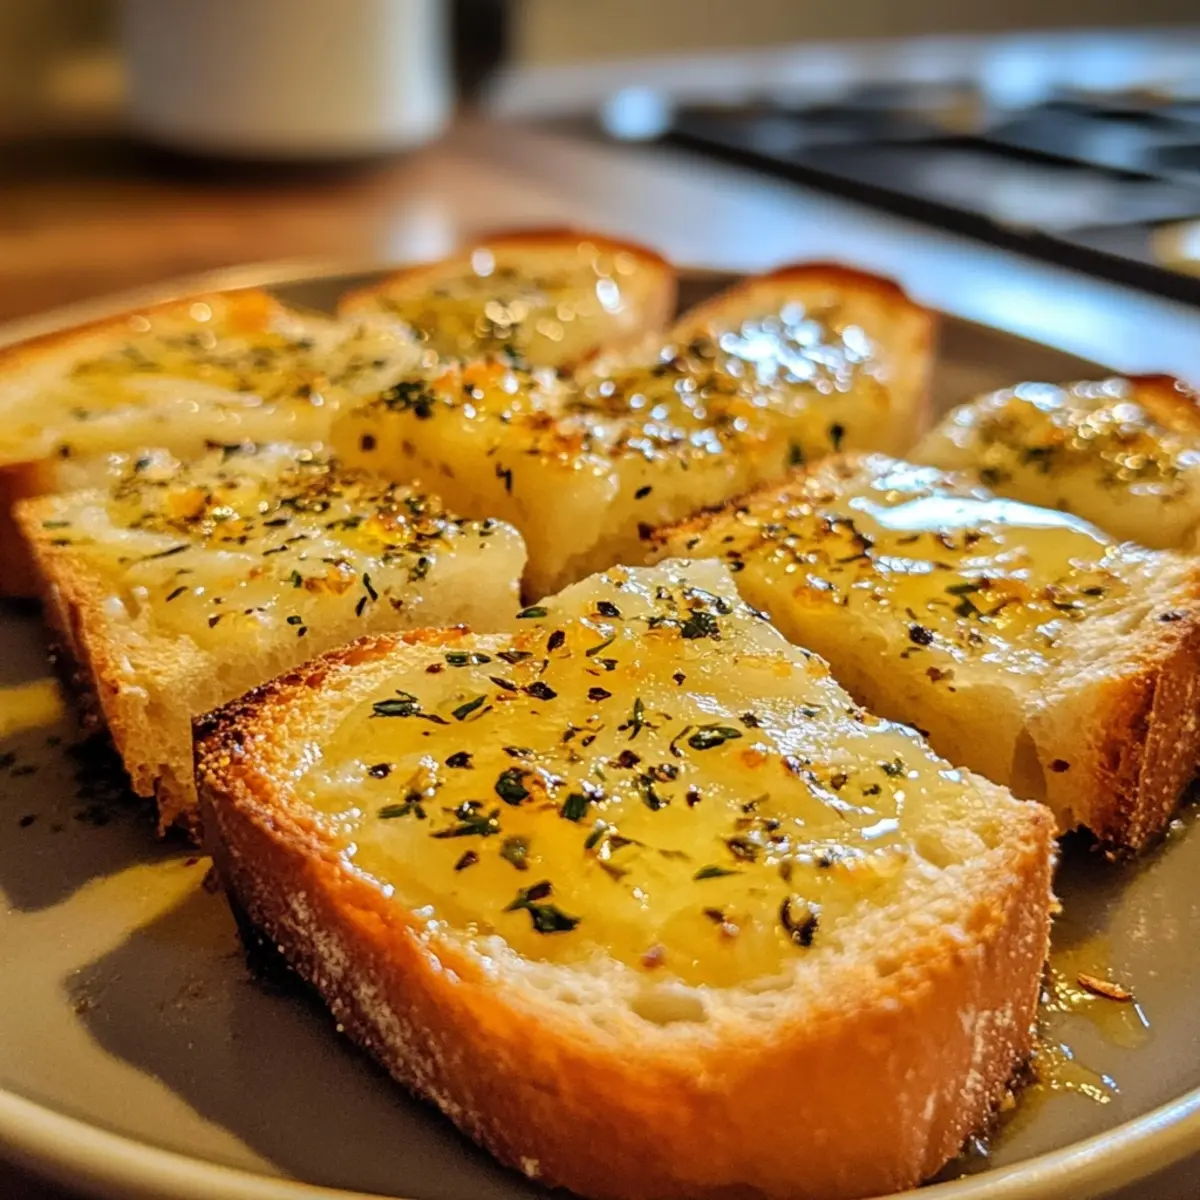
- Cool & Serve: Once baked to perfection, let the bread cool on a wire rack for a few minutes before slicing. Serve it warm, perhaps with a luscious pat of butter, or alongside your favorite soup!
Optional: Try sprinkling a bit of sea salt on top before serving for an extra touch!
Exact quantities are listed in the recipe card below.
Expert Tips for Roasted Garlic Bread
- Mind the Temperature: Use warm water around 110°F to activate the yeast properly; too hot might kill it.
- Patience is Key: Allow the dough to rest for the full 12-18 hours; this is crucial for flavor and texture development.
- Avoid Overmixing: Gently fold the ingredients; overmixing can result in a denser loaf and compromise the airy texture.
- Use a Dutch Oven: Baking in a preheated Dutch oven creates a steamy environment that helps achieve the perfect crust on your roasted garlic bread.
- Check Doneness: Use an instant-read thermometer to ensure the loaf reaches an internal temperature of 210°F for that ideal texture and flavor.
How to Store and Freeze Roasted Garlic Bread
- Room Temperature: Store leftover roasted garlic bread in an airtight container at room temperature for up to 3 days. This keeps it fresh and soft for your next indulgence.
- Fridge: If you live in a humid area, consider wrapping the bread in plastic wrap and placing it in the fridge, but it may dry out quickly; use within 3 days for the best taste.
- Freezer: To freeze, slice the bread first and then wrap each slice tightly in plastic wrap and foil. It can be frozen for up to 1 month, making it easy to enjoy later.
- Reheating: To reheat, pop individual slices in the toaster or wrap the whole loaf in foil and place in a preheated oven at 350°F (175°C) for about 10-15 minutes until warmed through. This brings back its lovely, fresh-out-of-the-oven texture!
Roasted Garlic Bread Variations
Feel free to get creative with this delightful recipe; experimenting with different flavors and textures can lead to new family favorites!
- Gluten-Free: Use a gluten-free flour blend instead of all-purpose flour, adjusting the liquid for desired dough consistency.
- Herb Infusion: Replace the fresh herbs with a single herb like rosemary or thyme to tailor the flavor to your liking.
- Cheesy Delight: Stir in shredded cheese such as parmesan or mozzarella to the dough for a rich, cheesy flavor throughout. It will melt beautifully while baking!
- Spicy Kick: Add a pinch of red pepper flakes or chopped jalapeños to the mix for a hint of heat that complements the garlic perfectly.
- Savory Add-Ins: Incorporate caramelized onions or sun-dried tomatoes into the dough for added depth and richness. These flavors blend exquisitely with roasted garlic.
- Sweet Twist: For a sweet variation, mix in a touch of honey and cinnamon, and consider topping the bread with a cinnamon-sugar sprinkle before baking.
- Nutty Crunch: Fold in toasted nuts, such as walnuts or pine nuts, for a delightful crunch and earthy flavor profile that enhances the bread’s texture.
- Vegan Option: Substitute olive oil with aquafaba (chickpea water) and use a plant-based butter to create a fully vegan version of this delicious bread.
Each of these variations can bring a delightful twist to your Roasted Garlic Bread. Enjoy experimenting and finding the combination that brings joy to your table!
What to Serve with Roasted Garlic and Herb No-Knead Bread?
Pair this delightful no-knead bread with a variety of dishes to create unforgettable meals that celebrate flavor and comfort.
- Creamy Tomato Soup: The perfect companion, its richness pairs beautifully with the aromatic notes of roasted garlic.
- Fresh Mixed Greens Salad: The crispness and acidity of a light vinaigrette can balance the bread’s hearty texture, enhancing your meal.
- Classic Beef Stew: A warm bowl of savory stew is elevated when dipped with freshly baked bread, making every bite a cozy delight.
- Herbed Butter: Slathering a rich, herb-infused butter on your warm bread creates a mouthwatering experience that dazzles the senses.
- Cheese Platter: Pair with a selection of creamy cheeses and cured meats for a charming charcuterie board, perfect for gatherings.
- Garlic Roasted Vegetables: These provide a delightful crunch and complement the bread’s flavorful essence, creating a well-rounded meal.
- Sparkling Water with Lemon: A refreshing drink like sparkling water enhances the meal, cutting through the richness and lifting your palate.
- Savory Sandwiches: Use the bread as an artisanal base for sandwiches, layering roasted veggies or deli meats for delicious lunches.
- Homemade Pesto Dip: The vibrant flavor of homemade pesto adds a fresh touch; dip your bread for a scrumptious burst of taste.
Make Ahead Options
These Roasted Garlic and Herb No-Knead Bread loaves are perfect for busy weeknights and make meal prep a breeze! You can mix the dough up to 24 hours in advance, allowing it to rest at room temperature for optimal flavor development. Simply prepare the dough and cover it tightly with plastic wrap, allowing the rich flavors to meld. When you’re ready to bake, shape the dough, let it rise for an additional 30 minutes, then transfer it to your preheated Dutch oven. For those who want to enjoy this delightful bread throughout the week, baked loaves can be stored in an airtight container for up to 3 days or frozen for up to a month—just slice before freezing for easy access. This way, you can savor the same warm, crusty goodness without much hassle!
Roasted Garlic and Herb No-Knead Bread Recipe FAQs
What kind of flour should I use for this recipe?
All-purpose flour works best to provide structure. However, if you’re looking for a gluten-free option, you can substitute it with a gluten-free flour blend. Just be sure to adjust the liquid as needed since gluten-free flours can absorb moisture differently.
How should I store leftover roasted garlic bread?
Store any leftovers in an airtight container at room temperature for up to 3 days. If you live in a humid area, you might want to wrap it in plastic wrap and place it in the fridge, but be cautious as bread can dry out quickly.
Can I freeze the roasted garlic bread?
Absolutely! To freeze, slice the bread first. Wrap each slice tightly in plastic wrap and then in foil, which keeps them from getting freezer burn. It can be frozen for up to 1 month. Just remember to label the packaging with the date for easy reference!
What should I do if my bread doesn’t rise properly?
If your bread doesn’t rise, it might be due to the yeast not activating properly. Ensure that your yeast is fresh and that the water you use is warm (around 110°F). This temperature activates the yeast effectively. Also, remember that resting the dough for 12-18 hours is crucial for flavor and texture, so don’t rush that step!
Is this recipe suitable for those with dietary restrictions?
Yes, this no-knead bread is versatile! You can customize the herbs according to your taste, and for those who have gluten sensitivities, simply use a gluten-free flour blend. Just check for any allergies related to yeast or specific herbs you choose to use.
Can I use garlic powder instead of roasted garlic?
While you can use garlic powder in a pinch, nothing compares to the rich, sweet flavor of roasted garlic. If you’re in a hurry or don’t have roasted garlic, use 1-2 teaspoons of garlic powder, but be sure to add it during the mixing stage with the flour to distribute the flavor evenly.

Irresistibly Easy Roasted Garlic Bread You’ll Crave Daily
Equipment
- Dutch Oven
Ingredients
For the Dough
- 3 cups All-Purpose Flour Substitute with gluten-free flour if desired.
- 1 cup Roasted Garlic Fresh or store-bought.
- 1/4 cup Fresh Herbs (e.g., parsley, basil, oregano) Customize according to your taste.
- 1 teaspoon Salt Essential for flavor.
- 1 teaspoon Yeast Use fresh yeast for best results.
- 1.5 cups Water Warm water around 110°F.
- 2 tablespoons Olive Oil Can be swapped with melted butter.
For the Baking
- 1 each Dutch Oven For baking.
Instructions
Making the Bread
- In a large bowl, whisk together all-purpose flour, salt, and yeast. Gently fold in the roasted garlic and minced fresh herbs.
- Pour warm water and olive oil into the dry mixture, stirring gently until it all comes together.
- Cover the bowl tightly with plastic wrap or a kitchen towel. Let it rest at room temperature for 12-18 hours.
- Place your Dutch oven (with the lid on) in the oven and preheat to 450°F (230°C).
- Turn the dough out onto a floured surface and shape it into a ball without deflating it too much.
- Allow the shaped dough to rest for about 30 minutes.
- Carefully transfer the dough into the hot Dutch oven. Cover and bake for 30 minutes, then remove the lid and bake for an additional 15-20 minutes.
- Let the bread cool on a wire rack for a few minutes before slicing.
Notes


Leave a Comment