
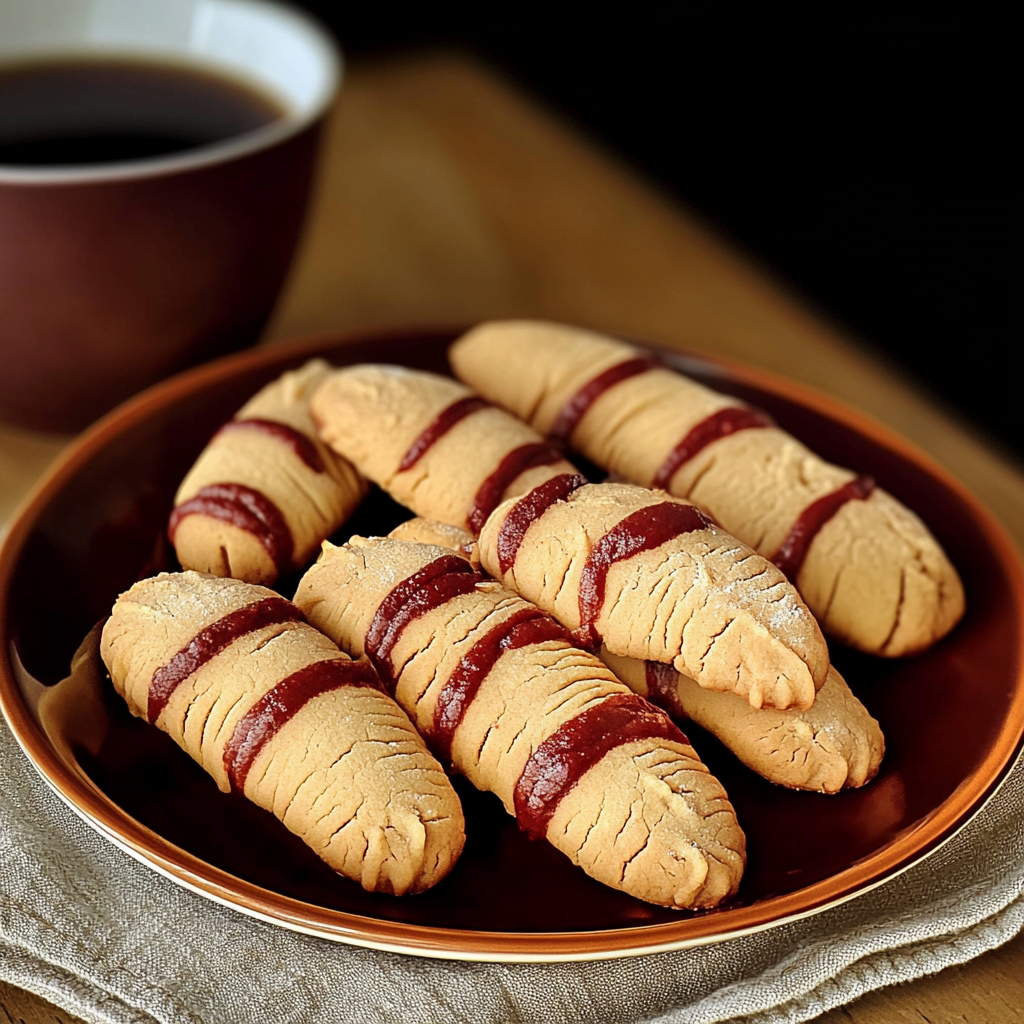
Witch Finger Halloween Cookies are a spine-chilling treat that looks as creepy as they taste delicious. Picture this: crispy edges, a soft, chewy center, and a hint of almond flavor that dances on your taste buds like a ghost at midnight. These cookies not only bring the spirit of Halloween to your table but also make for an excellent conversation starter. For more inspiration, check out this Easter Shortbread Cookies recipe.
Now imagine biting into one of these ghoulish delights while sharing ghost stories around a flickering candle. The eerie appearance paired with their delightful almond flavor creates an unforgettable experience. Whether you’re hosting a Halloween bash or simply indulging in a spooky movie night at home, these cookies will surely cast a spell over your guests.
Why You'll Love This Recipe
- These Witch Finger Halloween Cookies are easy to prepare and perfect for any Halloween gathering.
- Their unique shape makes them visually striking on any dessert table.
- The delicious almond flavor is sure to please both kids and adults alike.
- Plus, they are versatile enough to be decorated with various toppings for personalized spookiness!
Ingredients for Witch Finger Halloween Cookies
Here’s what you’ll need to make this delicious dish:
- Unsalted Butter: Ensure it’s softened at room temperature for easy mixing and maximum creaminess.
- Sugar: Granulated sugar adds sweetness and helps achieve that delightful chewy texture.
- Brown Sugar: Using brown sugar enhances the cookie’s moisture and gives it a rich flavor.
- Eggs: You’ll need one large egg to bind everything together into a doughy masterpiece.
- Almond Extract: This is what gives our cookies that signature flavor; feel free to adjust according to your preference.
- All-Purpose Flour: Essential for structure; too much can make the cookies dense, so measure wisely!
- Baking Soda: A must for leavening; it helps create those lovely puffy edges.
- Slivered Almonds: These act as nails on our witch fingers—spooky and edible!
- Red Food Coloring: Optional but highly recommended for adding that blood-curdling effect.
The full ingredients list, including measurements, is provided in the recipe card directly below.
How to Make Witch Finger Halloween Cookies
Follow these simple steps to prepare this delicious dish:
Step 1: Preheat Your Oven
Preheat your oven to 350°F (175°C). Line two baking sheets with parchment paper or silicone mats. This ensures our cookies won’t stick and makes cleanup easier—because who has time for scrubbing?
Step 2: Cream the Butter and Sugars
In a large mixing bowl, cream together the softened butter, granulated sugar, and brown sugar until light and fluffy. You might want to use an electric mixer here; it saves energy for more important things like trying not to scare yourself while watching horror movies.
Step 3: Add Eggs and Flavor
Beat in the egg and almond extract until well combined. Your kitchen should now smell divine—like an enchanting potion brewing in a cauldron (minus the eye of newt).
Step 4: Combine Dry Ingredients
In another bowl, whisk together the flour and baking soda. Gradually add this mixture to the wet ingredients while mixing until just combined—don’t overdo it! We want soft cookies, not witch’s broomsticks.
Step 5: Shape the Fingers
Scoop small portions of dough (about one tablespoon each) and roll them into finger shapes. Place slivered almonds at one end as nails; you can even give them a little bend for extra creepiness!
Step 6: Bake
Place your shaped cookies on the prepared baking sheets and bake in the preheated oven for about 12-15 minutes or until they’re lightly golden around the edges. If you opted for red food coloring, you can carefully dab some on each “nail” after they cool.
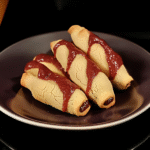
Transfer to plates and serve these spooky treats at your next gathering—they’re sure to bewitch all who dare take a bite! Enjoy every crumb while conjuring up tales of ghosts, goblins, or that time you tried making pumpkin spice lattes… Pumpkin Spice Sugar Cookies let’s just say some feats are best left unattempted!
You Must Know
- Witch Finger Halloween Cookies are not just creepy; they are a delightful treat for your spooky celebrations.
- Their eerie appearance combined with a delicious almond flavor makes them a hit at any Halloween party.
- Plus, they are easy to make and fun to decorate!
Perfecting the Cooking Process
Start by mixing the cookie dough until smooth. Shape the cookies into finger-like forms and press in slivered almonds for nails before baking. This method ensures even cooking and keeps them looking frightfully fabulous.
Add Your Touch
Feel free to swap out the almond extract for vanilla if you prefer a different flavor. You can also use food coloring to tint the dough green or orange for an extra festive touch. Get creative!
Storing & Reheating
Store your Witch Finger Halloween Cookies in an airtight container at room temperature for up to five days. If you need to reheat, pop them in the microwave for a few seconds to regain that fresh-baked feel.
Chef's Helpful Tips
- Start with cold butter; it helps create a better texture in your cookies.
- Use gel food coloring for vibrant colors without changing the dough’s consistency.
- Don’t overbake; keep an eye on those fingers—they should be slightly golden!
Sometimes when making these cookies, I can almost hear my friends’ laughter as they reach for what they think is a mere cookie only to find it creeping them out instead!
FAQs:
What are Witch Finger Halloween Cookies?
Witch Finger Halloween Cookies are spooky treats shaped like fingers, perfect for Halloween parties or celebrations. These cookies typically feature a light green or pale color and have almond slices as nails to enhance their creepy look. The combination of crunchy edges and soft centers creates a delightful texture that kids and adults alike will enjoy. Tombstone Cookies for Halloween You can customize the flavor by adding spices or extracts, making them a fun and festive addition to any Halloween spread.
How do I store Witch Finger Halloween Cookies?
To keep your Witch Finger Halloween Cookies fresh, store them in an airtight container at room temperature. They can last up to one week this way. If you want to extend their shelf life, consider freezing them. Place the cookies in a freezer-safe container, separating layers with parchment paper. When you’re ready to enjoy them again, simply thaw at room temperature for a few hours before serving. This method preserves both flavor and texture.
Can I make Witch Finger Halloween Cookies gluten-free?
Absolutely! You can easily adapt the recipe for Witch Finger Halloween Cookies to be gluten-free by substituting regular flour with a gluten-free blend. Look for blends that include xanthan gum, as this helps achieve the right texture. Witch Hat Cupcakes for Halloween Ensure all other ingredients, such as baking powder and almond slices, are also gluten-free. Your spooky cookies will be just as delicious and perfect for guests who follow gluten-free diets.
What can I use instead of almonds for nails on Witch Finger Halloween Cookies?
If you prefer not to use almonds for the nails on your Witch Finger Halloween Cookies, several alternatives work well. You can opt for slivered or chopped pecans or walnuts for a different flavor profile while maintaining that creepy look. Alternatively, mini chocolate chips or candy corn could add a fun twist. These options allow you to customize your cookies while keeping them deliciously eerie! For more inspiration, check out this Chocolate Cake Mix Waffles recipe.
Conclusion for Witch Finger Halloween Cookies:
In summary, Witch Finger Halloween Cookies are an exciting and fun treat that adds spookiness to any Halloween gathering. Their unique shape and appearance make them a favorite among both children and adults. By using simple ingredients and easy techniques, you can create these delightful cookies at home. Remember to store them properly to enjoy their freshness longer, and feel free to experiment with flavors and decorations! Happy baking!
Witch Finger Halloween Cookies
Witch Finger Halloween Cookies are a delightfully spooky treat that adds a touch of fright to your Halloween festivities. With crispy edges and a chewy almond-flavored center, these eerie cookies are shaped like witch fingers, complete with slivered almond nails for an extra creepy effect. Perfect for parties or a fun family baking session, these cookies will enchant both kids and adults alike!
- Prep Time: 20 minutes
- Cook Time: 15 minutes
- Total Time: 35 minutes
- Yield: Approximately 24 cookies 1x
- Category: Dessert
- Method: Baking
- Cuisine: American
Ingredients
- 1 cup unsalted butter (softened)
- 1 cup granulated sugar
- 1/2 cup brown sugar (packed)
- 1 large egg
- 2 tsp almond extract
- 3 cups all-purpose flour
- 1 tsp baking soda
- 1/4 cup slivered almonds
- Red food coloring (optional)
Instructions
- Preheat the oven to 350°F (175°C) and line two baking sheets with parchment paper.
- In a large bowl, cream together the softened butter, granulated sugar, and brown sugar until light and fluffy.
- Beat in the egg and almond extract until well combined.
- In another bowl, whisk together the flour and baking soda; gradually add to the wet ingredients until just combined.
- Shape the dough into finger-like forms, placing slivered almonds at one end as nails.
- Bake for 12-15 minutes or until lightly golden around the edges.
Nutrition
- Serving Size: 1 serving
- Calories: 130
- Sugar: 8g
- Sodium: 80mg
- Fat: 7g
- Saturated Fat: 4g
- Unsaturated Fat: 3g
- Trans Fat: 0g
- Carbohydrates: 14g
- Fiber: 0g
- Protein: 1g
- Cholesterol: 20mg
Leave a Comment